Have you ever wondered what happens behind the scenes when your corporate or private jet is being painted? In this article, we pull back the curtain, revealing what goes into a quality paint job from the initial creation of the design to the final details.
Choosing a Paint Scheme and Design
Do you know what you want for a paint scheme? In some cases, you may know exactly what you want; in others, you may need a little help deciding on a design. You might work with the paint facility’s designer or design team, or you may work with an independent designer to create a rendering that can be shared with the paint facility.
The aircraft is sent to the paint facility and inspected before stripping and painting begin. Particular attention is given to windows, flight controls, fuselage skin, and leading edges.
Inspecting and Repairing the Aircraft
After the aircraft has been stripped of all its paint, a second inspection will follow. Paint can hide underlying corrosion or other damage, such as deteriorated seam sealant that needs to be replaced.
Any evidence of damage found during the inspections is noted and a quote is sent to you for approval. Approved repairs will be performed before and during the painting process.
Prepping the Aircraft
Before the aircraft can be stripped of its existing paint, some parts of the aircraft must be removed or covered to protect them from the chemical stripper. For instance, control surfaces may need to be removed. If they are removed, they will either be stripped or sanded and painted separately.
Areas such as inspection panels, fairings, moldings, windows, openings, seams, composites, and engine intakes cannot be removed. They are covered (masked) before chemical stripping.
Stripping and Sanding
A chemical stripper is applied twice to remove the existing paint from the aircraft. It is sprayed on the surface of the aircraft and given time to activate (approx. 8-10 hours). Once it has broken down the original layers of paint, it is scrubbed off and the second coat of stripper is applied. A third layer of stripper may be applied if there are several layers of paint. After stripping is complete, the aircraft is washed with fresh water to clean the surface.
Seams and composite areas are unmasked and the aircraft is visually inspected for any hidden damage and corrosion. The aircraft is then mechanically sanded to remove any lingering paint.
Protecting Against Corrosion
After sanding is complete, an Alkaline cleaning and Alodine application are applied to exterior aluminum aircraft surfaces to protect the area from corrosion (oxidation).
Applying the Primer
The surface of the aircraft is blown to remove any dust or dirt and washed with a solvent applying the primer. The first application is a corrosion-resistant epoxy primer; the second application is a high-build primer to cover seams and rivets.
Additionally, all applicable composites are sanded and painted. If all paint is removed and the composite is sanded down to the base, an anti-static primer is also applied.
Using a Guide Coat
The aircraft is “guide coated” to prep for the base coat. A coat of paint of a different color than the primer is sprayed over the aircraft and sanded until only the primer color shows. This ensures that all indentations are filled and smoothed over.
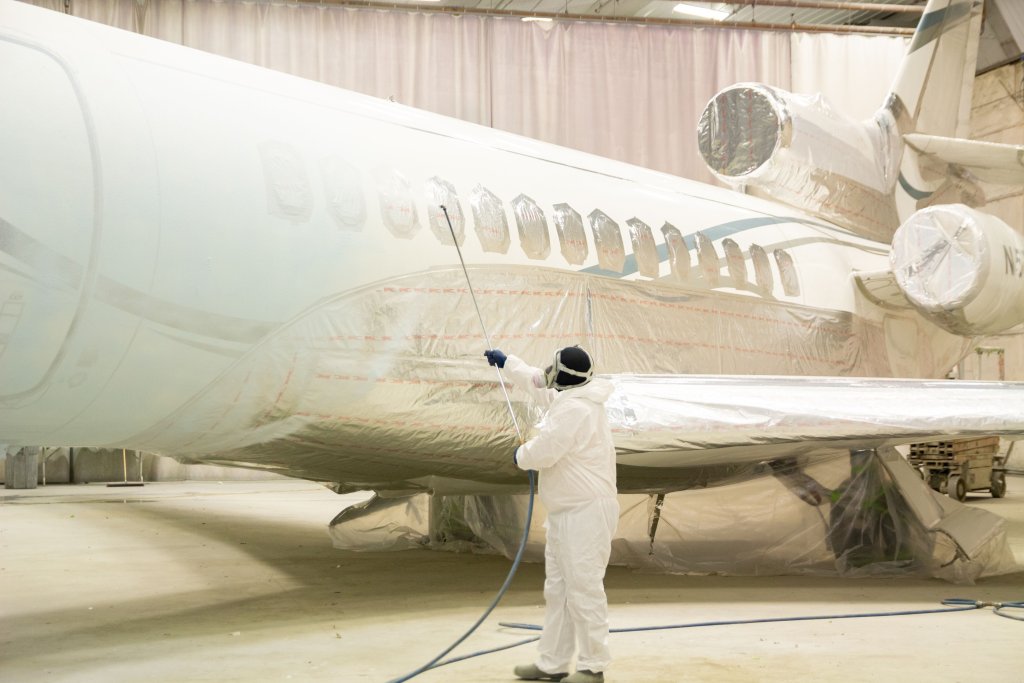
Applying the Basecoat and Stripes
2-3 coats of a high gloss polyester urethane basecoat are applied to create an even, smooth, and durable surface.
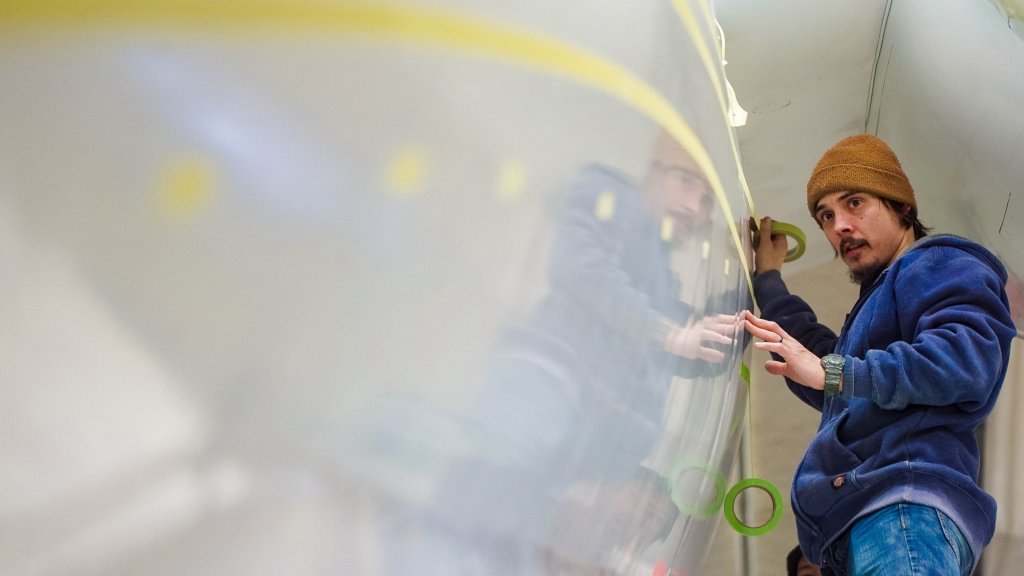
Stripes are laid out along the contours of the aircraft using painters’ tape or laser lines to replicate the proposed design. The rest of the aircraft is masked, leaving exposed only the area for the stripe (or stripes if multiple stripes of the same color are being painted).
The stripes and any other designs are painted using a process of unmasking areas for painting and masking all other areas to protect them from overspray.
After all stripes (and any other painted designs) are applied, 2 coats of clearcoat are applied to ensure protection.
Painting Additional Areas and Placarding
At this point, smaller areas of the aircraft are painted. These generally include gear legs and wheels, hinged access doors, baggage door jambs, air-stairs, and entrance door jambs. Parts that were removed from the aircraft are also painted.
Exterior placarding is applied. These placards are painted in accordance with the aircraft’s maintenance manual required by the FAA (or equivalent) and generally include instructions or warning labels.
Balancing, Reinstalling, and Detailing
Flight controls go through a balance check before being reinstalled, to ensure that the controls are within the required limits. Even a thin layer of paint can change the balance of the flight control, such as a rudder, aileron, or elevator, and may have to be adjusted. If a rudder previously did not have a stripe and now does, the rudder may need to be rebalanced to compensate for the additional weight of the stripe.
Components that were removed are reinstalled and sealer is applied where needed.
During detailing, any imperfections and dirt are removed.
Checking to Ensure Quality
Before the aircraft can be returned to service, an inspection of the work performed (painting, reinstallation, and any repairs) is conducted for airworthiness. The aircraft is clean, logbook entries are complete, and all required documents are onboard.
Reduced Vertical Separation Minimum (RVSM), which ensures aircraft keep a minimum distance apart from each other in flight, is checked to ensure compliance with Instructions for Continued Airworthiness (ICA) as indicated in the FAA-approved RVSM Operations Manual. Before the aircraft can return to service after being painted, the area around the RVSM must receive a skin waviness inspection to ensure that there are no imperfections that could interfere with the accuracy of the RVSM.
Now You Know
A lot goes into crafting a quality paint job on an aircraft. Understanding the painting process allows you to have realistic expectations for what to expect from a quality paint job.
Ever wonder what it costs to paint a private aircraft? Find out more information here: “How Much Does It Cost to Paint My Private Jet?”
Want to see the painting process in action? Check out our video of a Challenger 604 paint job.